Fades may be spotted on everything from Instagram viral reels to salon chairs. They can actually be used on almost any type or length of hair since they are fresh, focused, neat, and versatile. This article explains every detail you need to know about the fade haircut, whether you’re an amateur experimenting at home or an experienced barber honing your craft.
Review Different Types of Fade Haircuts
“Fade” is a general phrase. What really makes or breaks a cut is where that fade starts and how it flows. Still wondering what is a fade haircut? The breakdown is as follows:
Low Fade Haircut:
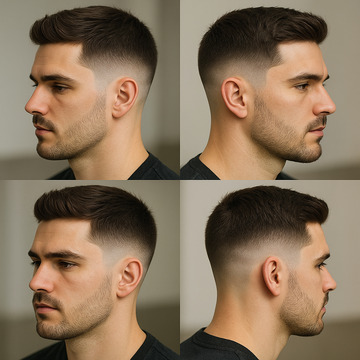
The top of the hair is left untrimmed or softly shaped as the low fade haircut starts right above the ears and eventually merges upward into longer hair. Because of its cautious, tidy appearance, this kind of fade is often picked by people who want a less striking contrast between the top and sides.
Additionally, it fits hairstyles like slick backs, comb-overs, and side parts. Fuller or rounder faces look good with a low fade. The hair grows on its own without seeming uneven or patchwork since it sits lower.
Mid Fade Haircut:
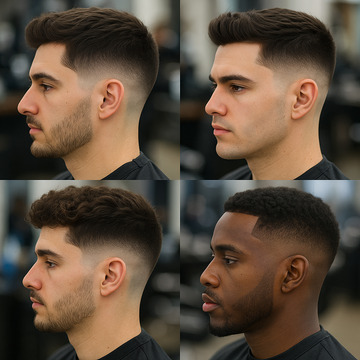
The mid fade hairstyle is the ideal balance of subtlety and brashness. With a more pronounced difference than the low fade, it starts roughly above the ears or around the temples and goes into the lengthier top hair. A wide range of hairstyles, including textured crops, curly tops, pompadours, quiffs, and slicked-back looks, accentuate the mid-fade.
Barbers can bring extra texture, volume, or color to the top while maintaining tight, crisp sides because it gives them greater creative freedom above the fade line. It looks especially attractive on faces with oval, diamond, and heart shapes. In addition to being low-maintenance between trims, mid fades typically grow out more evenly than high fades.
High Skin Fade Haircut:
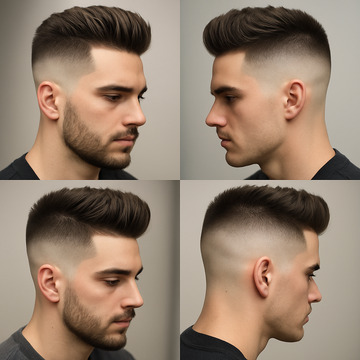
The high skin fade haircut swiftly shifts into longer hair on atop after beginning a lot higher on the head, typically at or above the temples and occasionally as high as the crown. This produces a slamming high-contrast that highlights the chosen top style and immediately underlines facial characteristics. It is very well-liked in athletic, fashion-forward, and military. Most of the sides are reduced to bare or very bare skin because of how extreme the fade is. Indeed, it’s a fantastic choice for men with broad or round faces.
High fades can have a drawback, too. They require more frequent treatment to maintain sharp lines and grow out sooner. However, when done correctly, a high skin fade creates an intriguing look and goes nicely with crew cuts, short buzzed tops, and even long textured tops for contrast.
Read More: The Mens Fade Haircut Everyone’s Asking For in 2025
Prep Work Before the Cut
Prep is key before you pick up clippers.
- Wash the hair:
Hair that is clean is simpler to trim and style. Avoid using thick oils or conditioners.
- Dry thoroughly:
Your mix may be affected by the way wet hair lies compared to dried hair.
- Decide on your fade type:
For instance, if you want a military high skin fade haircut, you’ll need to be more precise around the neckline when cutting short hair.
- Clipper guards:
Understand your numbers! Shorter cuts are indicated by lower numbers. Guards #0 (bare blade) to #4 are typically used for fades.
And here’s the unspoken rule: always cut less first. You can take more off later, but you can’t put it back on. Moreover, the protocol is same for even kids fade haircut styles.
Prep For Curly Hair or Coily Textures
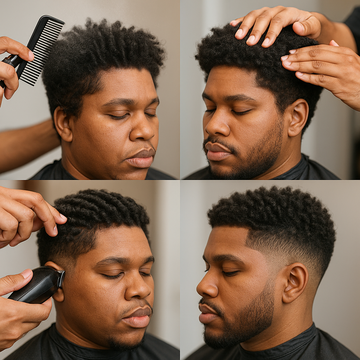
Curl preparation and moisture management are important when completing a fade haircut for Black men or curly hair. Clippers may drag or skip hair with curly or coily textures, especially if the hair is dry, knotted, or tightly shrunk.
- Before cutting, soften and moisturize the curls with a curl cream or leave-in conditioner.
- Use a pick or a wide-tooth comb to completely detangle. Do not omit this step.
- Before fading, use a comb to stretch the locks. This lessens the possibility of uneven levels and helps you trim on a uniform surface.
Pro Tip:
Use a blow dryer with a comb attachment to gently stretch the roots before cutting. Moreover, set it on low heat for 4C or tight coil varieties. This reveals the true length and delivers a balanced fade line.
Must-Have Tools For a Clean Fade
A sharp fade doesn’t happen by chance. It is the outcome of skillfully and meticulously using the appropriate tools. What you will need on your station is as follows:
Clippers
Select professional-grade clippers with taper levers that can be modified. You may adjust the length with them without constantly changing guards. More mobility is possible with cordless alternatives, but corded ones frequently provide stronger, longer-lasting power, which is especially helpful for thicker hair textures.
Guards (Guide Combs)
For the majority of fades, you will need guards numbered from #0 (bare blade) to #4. Smooth transitions are made possible by each guard’s control of hair length. You’ll probably start with no guard and work your way up to a #1 or #2 for skin fades or low fades.
Trimmers
To tidy the neckline, shape around the ears, and align the borders, use detail trimmers. The fade is defined by sharp outlines made with a sharp trim. If you want outstanding results, look for blades that have zero gaps.
Scissors (Shears)
Barber shears can be used for bulk removal where clippers can’t get to, texturizing thick areas, and blending on top. It is of special importance for taper fades and mid fades, where the top layer changes to longer ones.
Comb
Select a taper or fade comb that has both narrow and broad teeth. It will be utilized for both the scissor-over-comb and clipper-over-comb methods. A lightweight, flexible comb helps in maintaining uniformity and control over your angle.
Brush or Neck Duster
In order to remove loose hairs from the face, neck, and clippers, use a duster or a soft-bristle brush. Maintaining a clean canvas during detail work increases visibility and reduces distractions.
How to Do a Fade Haircut – Step-by-Step
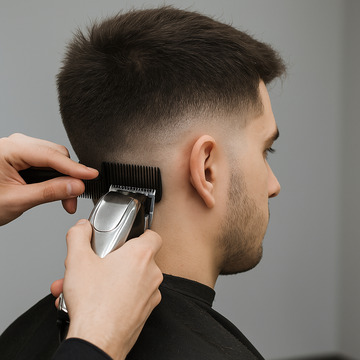
Let’s go over a standard skin-to-full blend fade! The same reasoning holds true for low and high fades, but we’ll concentrate on a mid fade here. Though feedback is helpful, keep in mind that pro-level fades are based on muscle memory. Take photos, get feedback from customers, and keep making adjustments.
Step 1: Define the Baseline
Start with a #0 guard or your clipper blade completely closed. Make a basic guideline around the back and the skull and slightly above the ears. The shaved region and the fade are separated by this line. Using a foil shaver or clipper blade for a more refined look, you will be shaving all the way down to bare skin for a real skin fade.
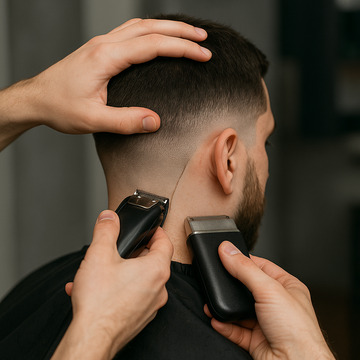
Expert advice: Don’t change your line. Use the skull’s inherent curvature as an indicator and tilt your head a little. Focus on a clean core first rather than aiming for symmetry just yet.
Read More: Cool Fade Boys Haircut for School | Summer Styles 2025
Step 2: Mark Your Second Line
Step up from your baseline by approximately one inch. Make your second pattern with the lever fully open and a #1 guard. Avoid forming a hard ledge or digging into the scalp by following a smooth, upward rocking motion. After the line is established, start blending down into the skin zone by softly working just below it while partially closing the lever. A smooth transition from the skin line upward is the target.
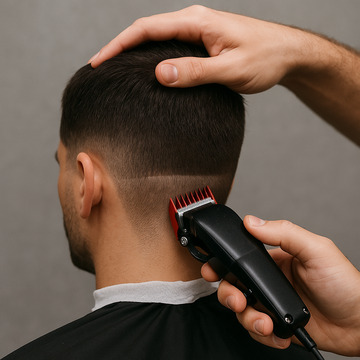
Takeaway: Don’t use too much pressure. Heavy-handed passes can leave deep lines that are hard to erase.
Step 3: Blend the Lines
It’s time to merge now. Your clipper will be used without a guard, and the lever will be steadily adjusted from open to closed. Blend right below the #1 line while the lever is open. The deep division will then be erased when you gradually shut the lever and move downward toward the skin line.
Instead of scraping with a blade, think of it as shading with a pencil. Make sure your strokes are effortless and brief, and conclude with a flick out.
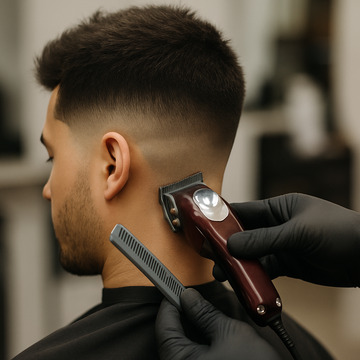
Detail tip: Tilt the clipper slightly when working in tight spots around the temples and behind the ears. This gives you more control.
Step 4: Build the Upper Transition
Then, mix the fade into the longer hair on top with a #2 or #3 guard. Use a #2 if the client desires a clear divide between the top and sides. Use a #3 for a gentler fading.
To prevent slicing through the majority of the top hair, work your way up using a scooping technique. There should be no obvious boundary between the fade and the top length, and your blending must appear natural.
Blending around the temple to the parietal ridge zone is the goal for mid fades. The shift should remain constant on both sides and adhere to the original head shape.
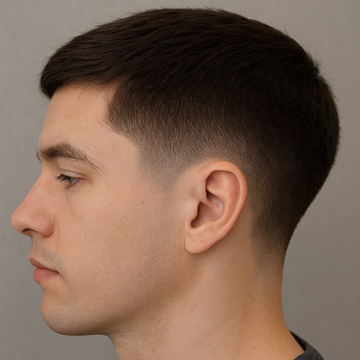
Tip for curly or textured hair: Use a guard with a clipper comb or fade brush to lift the hair slightly. This helps maintain structure while fading.
Step 5: Clean the Edges
Get your trimmer now. Cleanse the neckline, the area around the ears, and the forehead. The hairstyle is defined by razor-thin edges, which also give it a sleek look.
Pay close attention to edge-ups, especially when it comes to black men’s skin-faded haircuts. Do not force a straight line; instead, follow the natural hairline. Go slowly! The cut can be made or broken by a clean hairline.
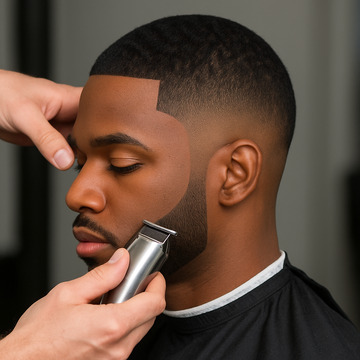
Optional: Optional: Make use of a straight razor with shaving gel after the trimmer for a neater face line or collar. Always shave with the grain, take your time, and stretch the skin.
Common Mistakes to Avoid
Even experienced barbers slip up. Here are five pitfalls to dodge:
- If there are significant steps in your fade, you should either change the lever halfway through or blend in nicely with guard lengths in between.
- Always take your time back and look at the cut from several perspectives. Never depend on a single mirror angle.
- Excessive mixing could cause the fading’s contrast to be lost.
- Use skin-compatible hair care products afterwards to keep scalp healthy and nourished.
- Skipping guards for the sake of saving time often results in jumpy transitions.
- Pay specific attention to the transition between the longer hair on top and the fade. It will appear messy if it is disconnected.
Advanced Tips for Pros and Barbers
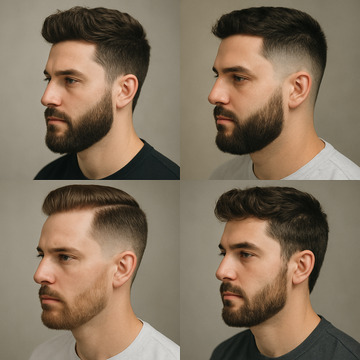
If you’re already cutting fades regularly, here’s how to elevate your game:
- Skin fade haircut for black men:
Clear and soothe the skin with a gentle brush and alcohol after the edge-up. Avoid shaving too much since blade rashes are common.
- Fade on curly hair:
To raise the hair and expose bulk areas, cut against the curl pattern. Then, blend accordingly.
- Scissor work:
To thin out and structure the crown without sacrificing shape, make use of scissors for customers who desire volume up top.
- Razor detailing:
The area around the neck and edges can be defined with straight shears. Always go carefully and pull the skin tight.
Conclusion
Fades Haircut appears basic, but it is actually rather difficult, when you want to achieve accuracy. It all boils down to patience, self-control, and tool knowledge, whether you’re looking for a military high skin fade haircut with piercing lines or a low skin fade haircut for an informal clean-up.
Begin slowly. Practice frequently. Additionally, if you’re serious about learning the fade, cut real heads, get real comments, and learn from real mistakes instead of just watching tutorials.
Have inquiries concerning particular hairstyles, tools, or types? Reach out or leave a comment.
FAQs
How to do a fade cut step by step?
- Start with clean, dry hair.
- Use clippers with a longer guard to trim the top.
- Decide on the fade type (low, mid, high).
- Use a shorter guard (e.g., #1) at the base of the sides and back.
- Gradually increase guard length as you move up the head.
- Use clipper-over-comb or blending guards to smooth lines.
- Detail the hairline and neckline with a trimmer.
How do you start a fade haircut?
Start by defining the baseline of your fade using the shortest guard, usually at the temple or nape, depending on whether it’s a low, mid, or high fade.
How to blend fade for beginners?
Use guards in sequence (e.g., #1, #2, #3). Overlap each section slightly as you move upward. Use clipper-over-comb for smoother transitions if needed. Always move the clipper in a scooping upward motion.
How can I do my own fade at home?
Use two mirrors for full visibility. Start with the sides using a low guard. Move up in guard size while checking for evenness. Keep movements consistent, and don’t rush. Finish with neckline and edges using a trimmer.
How to set up a fade?
Gather clippers with guards (#0 to #4), a trimmer, a comb, a spray bottle, and a mirror setup. Sit in good lighting and section off the top if needed.
Is fade hard to do?
It’s challenging at first due to blending and symmetry. With practice and patience, it becomes easier. Start with a low fade for more control.
How do I know where to start a fade?
It depends on the style:
- Low fade: start just above the ears.
- Mid fade: start around the temple.
- High fade: start above the temple, closer to the crown.
- Use the bone structure and head shape as your guide.
